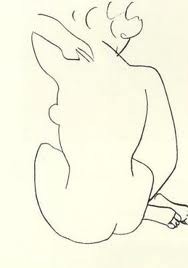
Some beautiful aspects of horse anatomy
April 26, 2012
Today I shall consider beautiful edge contours of the horse. In particular, I shall look at those of the chest and front limbs.
I’m currently thinking about the beauty of edges, and am also looking ahead to next month’s equestrian life drawing class.
Initial impressions of the horse
 As an artist standing in front of a real, breathing horse, the two things that initially strike me are the sheer chunky volume of the animal, and the beautiful elegance of its edges. When attempting to draw the creature as it moves, my instinct is to get those flowing edge lines down in my sketchbook as fast as possible; the curve of the neck, the sweep of the belly round and up as it merges into the back, the curve of the shoulder and haunch.
Symbolism of the horse’s shape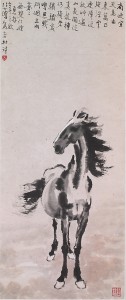
The horse silhouette is instantly recognisable and, perhaps, inspiring. His head carried proudly on an arched neck could symbolise pride, strength and elegance. Dressage trainers look at the moving horse’s “outline”, which is the term they use for the sweeping curve over the top of his back and neck, using this in conjunction with his leg action to help decide how well he is carrying himself.
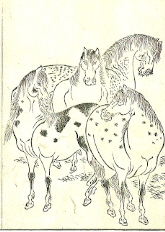
This ink drawing, “Heavenly Horse”, is by Xu Beihong (right):
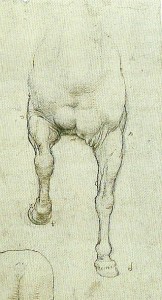
When the horse is standing facing me, the most obvious curves are those on the outer aspects of the forelimbs and under the chest. Let’s focus in on those areas today. Perhaps at a later stage I’ll consider the haunches, hindlimbs and head. In this drawing of the front of a horse by Leonardo da Vinci, these chest and forelimb curves are very clear:
The pectoral muscles
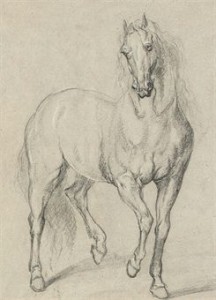
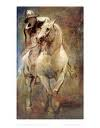
Between the horse’s front limbs are those well-defined paired curves of muscle, the pectorals. Look at how, in this drawing by an unnamed follower of Van Dyck, the double curve of the pectoral muscles is repeated higher up the picture up in the curve of the horse’s lip:
The groove between these right and left pectoral muscles is in the midline. You can make the most of this midline groove to clarify which way the horse’s body is facing. This groove shows the viewer where the front of the ribcage is pointing. Whichever way he twists his neck, limbs and tail, that midline groove is going to stay central.
The curve on the outer aspect of the front leg
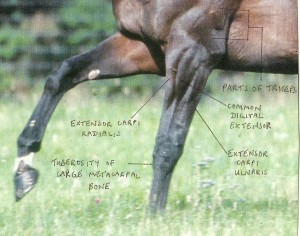
The elegant curve on the outer part of the horse’s upper forelimb appears to be made for artists. This convex sweep of flesh is actually made up of two muscles, the common digitial extensor is on the outer aspect of the leg, and the extensor carpi radialis is at the front. This is often seen and painted as one curving shape though, as you can see from this photograph, the individual muscles may become apparent in a fit horse when weight is put on the leg.
So, which muscle are you actually representing when drawing the upper forelimb with a calligraphic sweeping line? If it is a side-view of the horse, you will be drawing the ext. carpi radialis at the front of the leg. When viewed from the front, the curve represents the common digital extensor.
El Greco’s “St Martin and the Beggar”
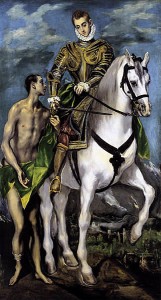
I came across this painting, “St. Martin and the Beggar” by El Greco, in the massive book “The Horse” by Rachel and Simon Barnes. For some reason, the picture is reproduced in my book the reverse way round, with the beggar to the right hand side of the picture. Does anyone know why this would be? Here I show the version with the beggar on the left side:
Simon Barnes writes that “the contrast between the sleek sublimely maintained horse and the skin-and-bones beggar is the story of the saint’s conversion”. On the other hand, it appears to me that the figure of the beggar is deliberately made to echo that of the horse. Look how El Greco has distorted the muscles of the forelimbs (they are all there, just twisted around a bit) so that they resemble the arm and legs of the poor man. The horse and beggar almost appear to be one creature rising up on six legs, while the painting of the clothed wealthy rider is handled more rigidly.
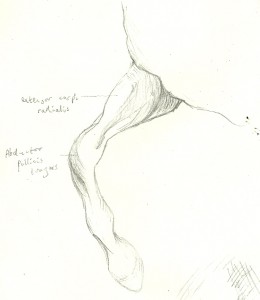
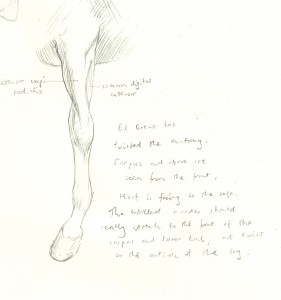
Out of interest, here are diagrams that I made a few weeks ago from my (mirror-image) reproduction of El Greco’s “St. Martin and the Beggar”, showing the twisted anatomy of the forelimbs:
Of course, there is no need to learn muscle names. I am just including a few of them for anyone who may be curious. The joint in the middle of the front leg is called the carpus. The diagonal band of muscle and tendon that crosses the front of this joint is the abductor pollicis longus.
And following my last post about the problem with edges, do I have any solutions? Yes, but I am not sharing these ideas until tomorrow’s workshop…
Simon Barnes
| Tags: anatomy, horses
What is the problem with edges?
April 24, 2012
I’m referring here to the physical boundaries of an object, the “edge” or “contour” of the object between itself and its background. Edges also occur wherever there is a sharp change in plane within a form, even if this would not show up in a silhouette drawing, e.g. the edge of a windowsill, a fold of fabric or the crease across a baby’s wrist.
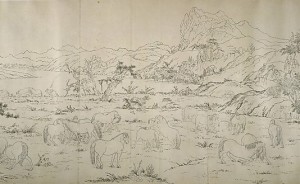
In real life, what we actually see of an edge depends on how the light falls on it. There is often a difference in tone and perhaps colour between the object and its background, and there is often a pool of shadow either beneath or on both sides of certain edges. Occasionally, an edge may appear as a line of highlight if the light is falling directly on it, e.g. the edge of a mug in sunlight.
We rarely see edges as lines in real life, though in itself this fact doesn’t mean that we must not represent them as lines in our pictures.
Well… I love to draw edges
Drawing the edges of things is a wonderfully direct and simple way to represent them. In our culture, children are taught from infancy to draw objects in this way (to draw an “outline”), then perhaps to colour in as a second stage.
As artists, we consider tone, volume and other aspects of representation, though the potential for emphasis of edges is still seductive. The use of edges can suggest a 3-dimensional form while also creating beautiful 2-dimensional shapes within our picture.
Many artists, myself included, love the process of drawing lines. The great profusion of possible linear media available, from bamboo pens to water-soluble pastel sticks, draws us in yet further…
So what is the problem?
Some potential pitfalls when using linear edges (I have been guilty of all of these):
- The edge as visible line rarely exists in nature, so we need to manage our edges in some way to produce a convincing image.
- Edge quality varies depending on the effects of light, so an unvarying line may be inappropriate.
- A solid edge may make the image appear to be “fixed” in space and destroy any suggestion of movement.
- The outline of a thing doesn’t always represent how the weight falls through it and, for that reason, sometimes fails to give the viewer much information.
- The mere outline of a subject does not give much information about its volume in space and can be misleading (e.g. are we looking at a woman or a cardboard cut-out of a woman?)
- A solid unvarying edge sets our image “in stone” as if the artist is saying “this is definitely how I see this thing”. If working in such a way, the artist must get the edges in exactly the right place with exactly correct perspective and foreshortening or the image will look faulty.
- Many edges do not, in real life, mark a change in tone. There may be a pool of shadow on both sides of the edge. This can create a technical problem if the artist attempts to draw an outline first, then shade it in.
- The outer edges of a rounded object represent the parts that are disappearing from view. Perhaps they should be given less emphasis than the centre of the object that bulges towards the viewer.
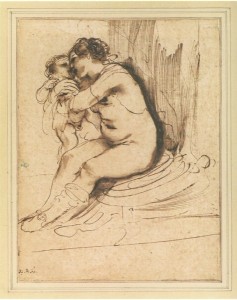 So should we draw edges as lines or not?
Yes, don’t throw away your favourite pens. If we take the above considerations into account then lines can indeed be used to represent edges. Convincing images are possible, and the lines themselves can be beautiful. For example, look at this drawing by Guercino (1591-1666).
In my “What to do about edges” workshop on Friday 27th April, I shall share plenty of suggestions as to how to make this work. There are different strategies that can be used, depending on the aim of the artist. I am currently gathering together some Old Master pictures to illustrate possible methods of working, and we shall discuss these and apply them to still life drawing. Guercino was a master of meaningful edges, and we can refer to the book, “Guercino Mind to Paper” by Julian Brooks. I am also selecting pictures by Henry Moore, Rembrandt, Leonardo da Vinci, Matisse and Raphael among others.
